Sunday, November 11, 2012

I think I have just found my artistic side! :-)

Wow!!!!!  What a great day I had yesterday.! 
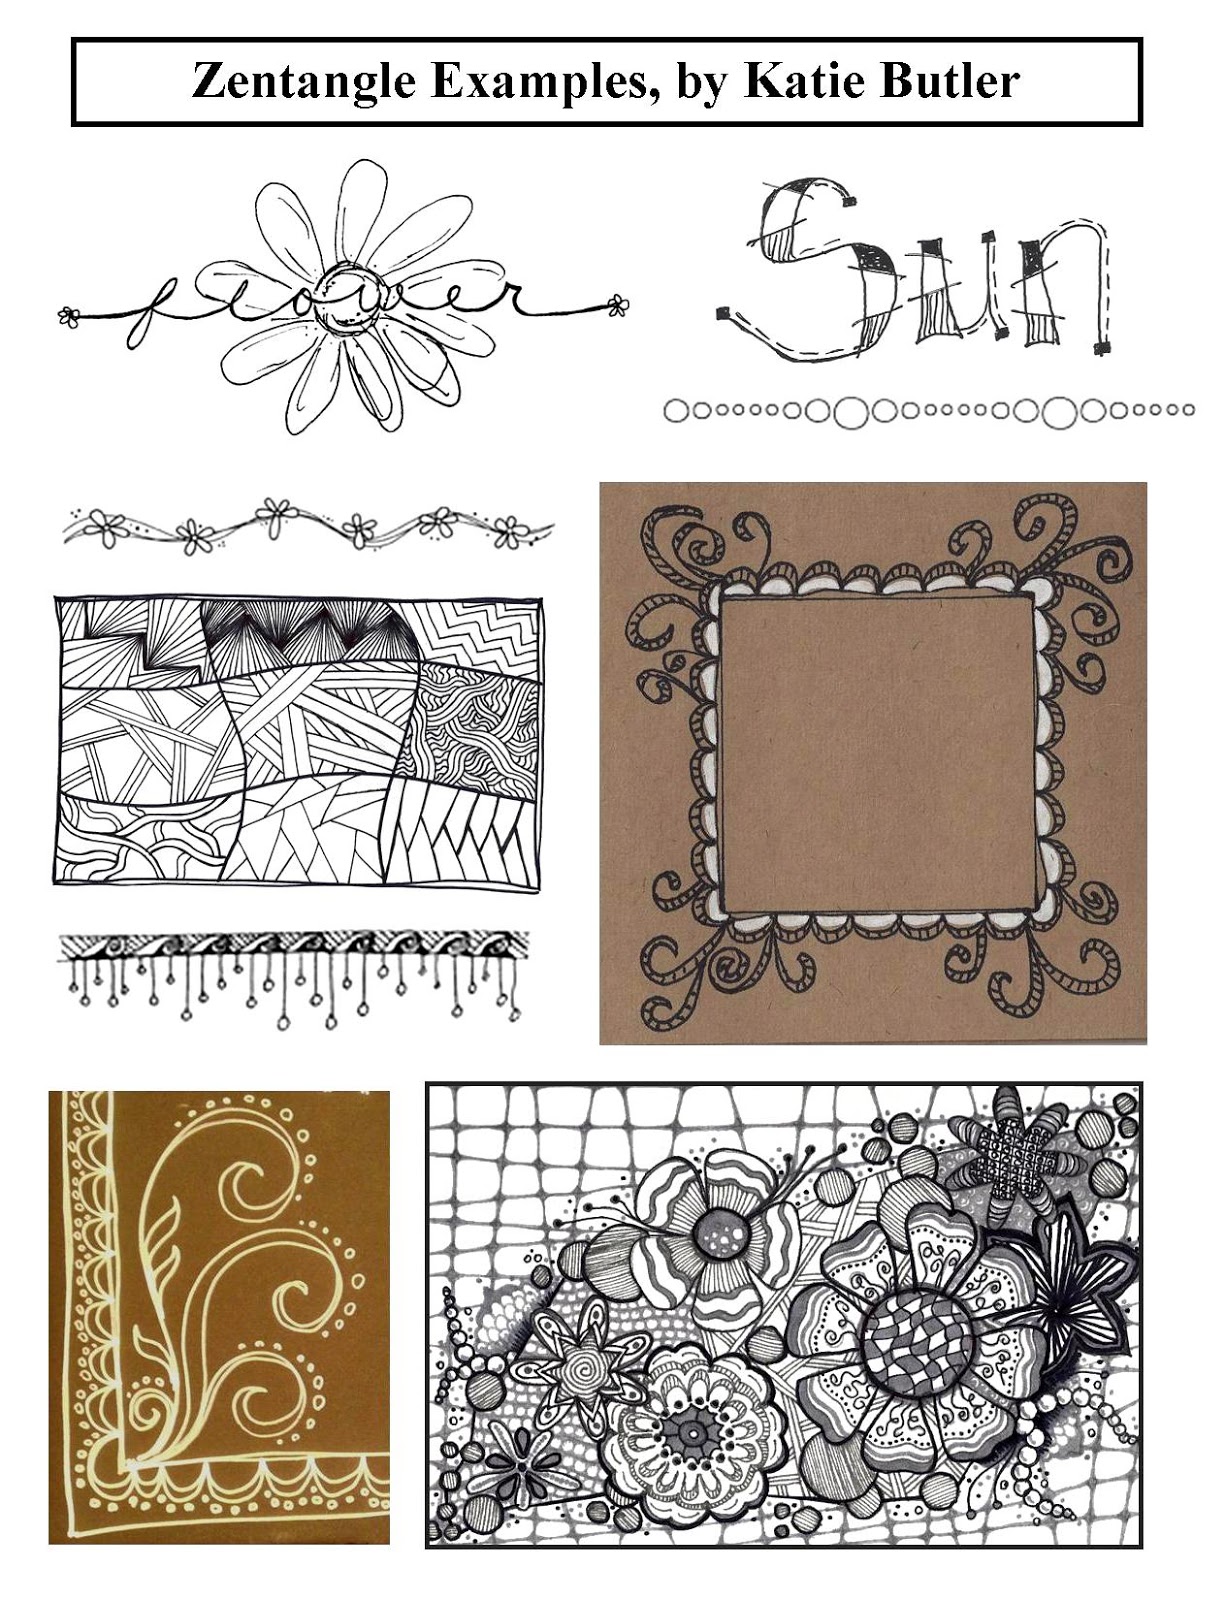
First I learned how to draw... well sort of, I learned the basics of Zentangle.  Some of it I really enjoyed, you know, the structured ones.  I am still having a hard time with the whimsical ones, but I am learning.

photo.JPG   photo.JPG
These are two zentangle frames I created.  Remember, the class was Zentangle for your crafts.  So I was practicing with my scrapbooking in mind.  I may just have to make some frames for the family for Christmas.  I have also been practicing a couple "real" zentangle patterns, and am totally  loving it.

Then I actually purchased 6 of the Spectrum Noir alcohol ink sets.  And, had a blast!  Many of you from Kansas City area would actually be so proud of me.  I think I mostly made it work.  Well at least, that is what Katie Butler tells me.  But wow, I really enjoyed it.  Here is my mouse:

It needs some work, and in fact, I did work a little more on the "ground", and it does look better now, but this is the first "artistic" thing I have ever done that I have been happy with.  Well, I just may be getting hooked, and I plan to purchase the rest, and I may even have to purchase some Copic markers.  Who knows where this will take  me!
NEXT, we are going to start mixing the two together.  I promise it will be a lot of fun.  As soon as we can get 12 people set up for a class here in Troy, at Speedy Scrappers, we will be able to get Katie back here to teach more.

Sunday, October 28, 2012

Great news for all my followers.  If you are following me from Independence at Christine's Corner for Scrapbooking and you loved to attend Katie Butler's classes, you will have another chance.  She will be teaching at Speedy Scrappers on November 10 and Novebmer 11.  Here are her flyers:


As you can see, that flyer is for the Paper Crafting with Zentangles.  It promisses to be a lot of fun.  If you have never taken a class with Katie, you really should!  Katie is vivacious and full of energy.  Her scrappbooking style is eclectic, so it is a sure bet she has something in her repretoire that you can use.  Her second class is on Alcohol Inks, here is that flyer:
 
 
She will be teaching both classes twice, once on Saturday and once on Sunday.  If you are interested in attending, contact me at christinescrops@gmail.

Thursday, September 27, 2012

And we are off and running!

Running?  Did I say Running?  Well, for now, I believe I will be crawling!  At least for a short time.  Katie and I have been working on this for quite some time, and that in and of itself has been quite interesting as she lives in Kansas, and I live in Illinois.  By the way, those of you who have followed me from Christine's Corner will probably recognize the work of Katie Butler, she has been wonderful.

Also, if you look around in here, you will find that she is represented all throughout.  She has a new business up and running, and it will be great fun for everyone.  So keep an eye on Cedar Chest Designs.  It is a wonderful e-store.  Stop in and check her out:


Cedar Chest Designs is Katie's e-commerce store, but she is also teaching at scrapbook stores around the country!  She is teaching Copic Markers, scrapbooking, and lots of other things.  Watch for up coming events for Midnight Pixy Designs at her blog.   In fact, here is a link to her blog: 

 http://midnightpixydesigns.blogspot.com
 
 
So, now that I have created my first blog post, I promise they will get better and better, I simply need a little bit of time.  After all, I am just learning how to do this stuff. I know, I have been playing with computers for all of my adult life, but this is a totally new program for me. However, I will get better and better everyday.
 
Start a party... craft with friends!

Wednesday, September 19, 2012


Check out this brand new digital crafting site!


Cedar Chest Designs, Digital Stamps and Supplies
Cedar Chest Designs is a website that sells digital supplies for the craft world. This includes digi stamps, digital scrapbooking supplies, Silhouette Cameo cutting files, Copic marker teaching sheets and more. Cedar Chest Designs offers instant file downloads, zero shipping charges, bulk discounts, educator benefits and unique designs. You can purchase images by visiting the site at http://CedarChestDesigns.com/.

Related sites are available at these links:

Saturday, September 15, 2012

Holden High Project Grad Crop


WOW! We had a great time!

The Holden High Project Grad Fund Raising Crop was a small crowd, but that just let it be very intimate.  Everybody loved the special Holden Eagles Title and the Holden Eagles Frame page I created just for them.  It is these little pieces that make scrapbooking so much more fun.  I almost sold out, but don’t worry, I will have them available again for the Zachary Timmons Memorial Crop in January. 

We held this crop in the Hallar Building in Down Town Holden.  It was a wonderful venue, the seating was comfortable, and we all had lots of room.  I tell you , these Holden girls sure do know how to put on a crop!  We had snacks all day, with a baked potatoe bar and chili for dinner.  Everything was delicious.  I can't wait to do it again! 
 

Tuesday, January 31, 2012

Technique - Glimmer Mist

Have you ever wondered what to do with your bottle of Glimmer Mist. Check out this link to see lots of techniques and ideas on how to use it.

Technique - Paper Tearing

This page is the perfect example of how paper tearing can be used in your scrapbooks. You’ll notice that the background papers, title box, and page elements have been torn to create more texture and interest. Even the little flowers have been quickly torn from scraps of paper to create adorable little embellishments. To make your own hand torn flowers, simply cut the paper roughly into the shape you want and then tear around the edges.

Six Tips to Remember: 
  1. When paper tearing, pull the torn edge towards you in small controlled motions to keep the line where you want it to be.
  2. Don’t tear too fast, you will simple rip the paper without any consistency to the tear.
  3. Try placing the edge of the paper along the edge of the counter or table so you can easily grasp the paper and guide the tear line.
  4. Not all paper tears the same. Practice on a little scrap piece so you can see how that particular sheet will act before going all out on your page pieces.
  5. For best results, use color core paper. It will tear more easily and provide you with the perfect color on your torn edge.
  6. Ink and paper tearing are a great combination for rough and distressed effects. Simply tear the paper in the way you want and then use an applicator pad or sponge to rub the distress ink into the torn edge.
 Next time you get stuck on a page and don’t know what to do, try tearing a few of the edges. You’ll be amazed at how easy it is to do with just a little bit of practice. The best part is, this technique doesn’t require any extra tools to do.